Clicker training is a positive reinforcement method that is scientifically proven to help your pet learn up to 45% faster. Clickers work with all animals, even people!

What is a clicker?
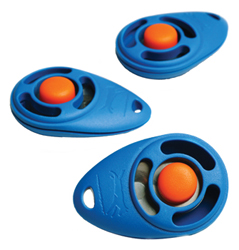
A clicker is usually a small plastic box about (1"x 2") with a metal tab fitted inside. When you depress the metal tab quickly it produces a sharp "click." They come in a variety of options, I prefer the button clicker shown here.
What is the purpose of a clicker?
The click is used to "mark" a behavior. When you are training a pet, you must "mark" the desired behavior to let them know what they did correct. This can be done with your voice, but a click always sounds the same, it doesn't change with your mood. Once you click, you give a treat to encourage a repeat of that behavior. For example, when a dog "sits" you might say "Good!" or "Yes!," the "click" is a more consistent way of "marking" the behavior.
Why should I use a clicker instead of words to mark the behavior?
You can still use words and should use words to mark a desired behavior. You won't always have a clicker with you. When you are teaching new behaviors or refining old ones, the clicker will allow you to teach the behavior much faster and with a finer degree of control.
Why does the clicker work so well?
You will teach your pet that the "click" means they get a reward. Once the animal relates a "click" with a treat, you have an unlimited tool for teaching them. Any behavior that is rewarded will be repeated. The click is a very clear marker for your pet that a reward is coming. Clicker training, once you have some practice at it, is a much more precise marker than your voice. Consistency is the key to training and a "click" that is always the same will work much faster than a verbal cue that may change depending on your mood.
Where can I find a clicker?
The major chain pet stores carry clickers, Petco and Petsmart, you can even find them at Walmart. You may want to try the clicker before you buy it to make sure it works well. When you quickly depress the metal tab you should get a sharp "click." The tab should depress easily and rebound smoothly. You may also find clickers online and in some pet magazines. There are a variety of clickers besides the original box shape, even ergonomic clickers. Check out our Product Recommendations page.
How do I get started?
Before you start working with your your pet, get comfortable with the clicker. First, you should practice your timing. A click should be given at the exact nanosecond the desired behavior occurs. Of course, no one is that good, 😁 but the more you practice, the better your timing will be. And animals usually figure out what we mean.
Practice away from your pet so he does not become desensitized to the sound. Have someone help you. Pick one finger that you will click when they hold it up, say the index finger. They can randomly hold up a different fingers, you only click when they show the index finger, click at the exact moment they hold up that finger. If you don't have someone to help, try bouncing a ball, click when when it hits the ground, or at the peak of the bounce. The more precise you are, the better, but you don't have to be perfect, your pet will usually figure it out. Practice your timing below, or try this link: Click game.
Remember, the clicker is not a remote control device. You may find yourself pointing the clicker at the animal. To avoid this, practice clicking with your hand at your waist, by your side, or behind your back.
Another thing to note is that the "click" ends the behavior. "Click" means a treat is coming, so the animal is allowed to get out of the sit or down and basically stop whatever it is you were teaching. That's fine! It just gives them another chance to earn a "click". We will work on duration later.
You also need to have a soft treat to give your pet. Small tidbits, no larger than the eraser on a pencil are used as rewards. You may also use canned food or similar consistency treats. You will want to practice delivering the treat after the click. Place 10 small treats in the same hand as the clicker. When you click, take a treat and place it in a small bowl (you are simply simulating giving the treat to your pet.) Canned food/treats require slightly different handling. Keep the dispenser close so you can deliver the treat from it to the pet as soon as possible after the click.
Practice clicking with both hands and giving the treats with both hands. This will help you down the road. Practice your timing below, or try this link: Click game.
Here's a way to practice clicking and you can see what your time is. Don't worry, a few milliseconds difference won't hurt. Practice always makes you better. The idea is to know what you are looking for, watch for it and click when it happens.
Practice your timing below, or try this link: Click timing game.
Test your Response time!
Click the "Start" button first, and wait until the background color changes. As soon as it changes, hit "stop"!Free DHTML scripts provided by
Dynamic Drive
Next step:
1: Add your pet. (Please do at least this step before class.) Now that you are more comfortable with the clicker, it is time to introduce it to your pet. Make sure you do not feed your pet right before a clicker session. Use a soft treat or canned food that the animal really likes. Put your dog on a leash at first so they do not wander off. If training a cat or other animal, work in a small room and close the door.
Now, click and treat. Repeat this 10 times (5-10 times for cats) no matter what the animal is doing. Offer the treat to your pet right after the click. Wait for them to swallow, then repeat.
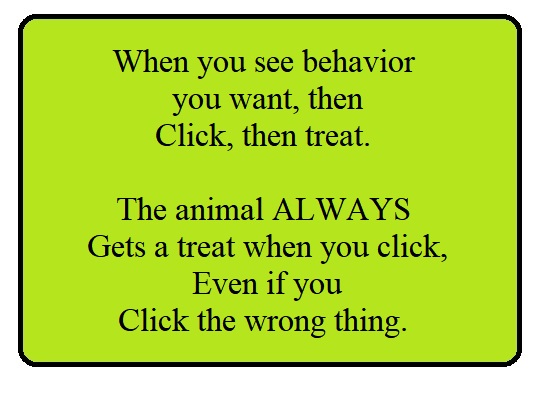
Keep your sessions short, 5 to 10 click/treats. Take a short break then start again. Repeat this step 3 to 5 times, depending on the animal. It does not usually take very many practices for the animal to understand that a click means treat. Once the animal is looking at you after every click/treat you are ready for the next step. More than likely, your pet will start to 'look' for a click within a few practice sessions.
Some animals are frightened by the click at first. You can use feeding time to get them accustomed to it if they are afraid by clicking once while the animal is eating. The idea is not to frighten them, but for them to start associating the click with food. Praise the animal after the click, especially when they offer more normal "positive" body language. Praise can include touching and petting the dog, verbal praise and treats.
IF your pet seems frightened by the clicking noise, do not give up. Make sure the reward is something the animal really wants. You can soften the click at first by putting the clicker behind your back or muffling it with a piece of cloth. Verbally praise your pet after each click and keep the experience very positive.
This is all you need for your first class, but if you wish, you can continue with these instructions to get ahead. 😁
2: Teaching a behavior - Now you are ready for the next step. One of the first things to teach is eye contact. When your pet looks at you, you know they are paying attention. To encourage this we will click when they look at us.
Start with 3 or 4 click/treats, it doesn't matter what your pet is doing, the wait for your pet to look at you. When they do, click and treat. Repeat this, when they look you in the eyes, click then treat. IF you click by mistake, you must still treat the animal. Don't worry, they will quickly get over your mistake, although sometimes you'll end up with a cute trick this way.
Again, you will need to repeat this step until the animal is consistently looking back up at you. Only then should you go on to the next step. Keep your sessions short. A good way to measure this is to get 5-10 small treats then click/treat each time they make eye contact until the treats are gone. Take a short break to get more treats, then start again. Limit your total time to 5 minutes. Practice again later in the day or the next day. Work on this step until the response you want (the animal looking into your eyes) is offered quickly and frequently. It may take only a few sessions, or it may take a dozen. Don't worry if your pet doesn't seem to get it right away. If it is an older dog or a cat, it may take more practice.
Once the animal is looking at you, making eye contact for the click and treat, you can go on to teaching other behaviors. If you want to put this behavior on cue, you can, but generally I like to use eye contact as a way to gauge when the animal is ready to pay attention and play the clicker game.
3: Teach sit and naming the behavior - Your pet may already 'know' how to sit on cue. If so, great! We can use this to show you how to name a behavior. If your pet doesn't know 'sit', let's work on that.
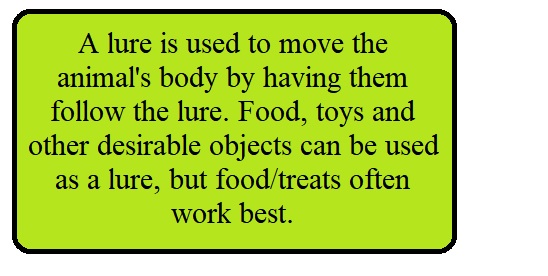
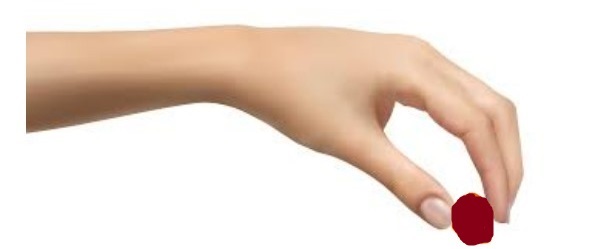
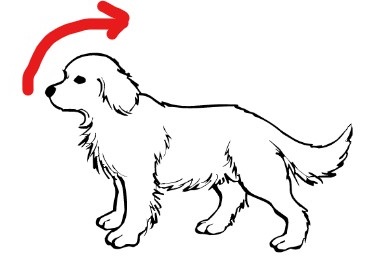
The easiest way to teach sit is to use a food lure to get the animal into position. To do this, hold a treat between your thumb and the tips of your fingers. Put the treat right in front of your pet's nose and slowly move it up and over his head so that he lifts his nose to follow it. Keep your hand and treat close to the dog. Follow the arc of the red arrow in the image below. As you lift the treat and his nose, his rear end will lower and eventually hit the ground. Click and treat with the food in your luring hand.
If your pet is backing up, get the treat closer to their nose and go more slowly. Once you get them to sit, click/treat. Repeat this 3-5 times with the treat in your fingers.

Next we need to fade out the food lure. Get a treat and pretend to hold it in the same hand, but instead put it in the hand with your clicker, so you can get it quickly. With your pretend treat, repeat the lure to get the animal to sit, as soon as their rear end hits the floor, click and treat with the hidden food. This is how you will continue to practice getting the animal to sit, without having to have a food lure in front of their nose. You may need to use the food lure a few times more, or during your next practice session as a reminder, but soon you should be able to get the animal to sit with just your hand lure directing them.
Notice we have not said 'sit' yet? That's because you want to get a consistent behavior before you name it. If you can get the animal to sit with just your hand lure 8 out of 10 times in a row, then you can be sure the animal understands what it is you want him to do (in this environment and situation). We are now ready to put the name on the behavior. You may also want to start teaching a hand signal at this point.
Adding the verbal cue 'Sit'
During your next set of 10 treats, we'll start to put the name on. First, say the word 'Sit,' then give the hand lure. When the animal sits, click/treat. Repeat. Soon you will notice that the animal sit's when you say 'Sit'.
Adding the hand signal
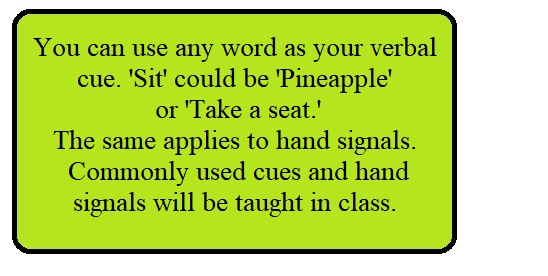
Your hand signal may look slightly different from your hand lure, give the hand signal (see below), say the word 'Sit' and wait for the animal to sit. He may be confused, give him a few seconds to figure it out. If needed, you can repeat the cues and try again. Most likely, because you've been practicing the sit behavior, he will offer what he thinks you want and sit. If not, you may need to back up a step - saying 'Sit' just before you give the hand lure. You can always add the hand signal in later.
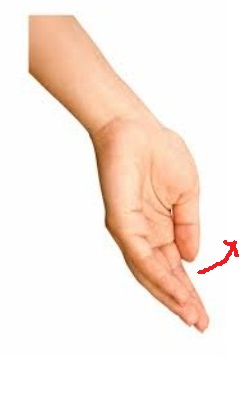
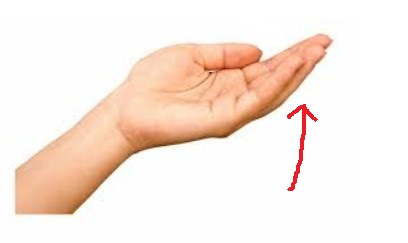
Hand signal for 'Sit': With your arm hanging by your side, turn your palm facing front toward the animal. Lift your hand up so your palm is toward the sky until your elbow is bent about 90 degrees.
If your pet already knows 'Sit' on cue, you can still follow these steps to help them learn what the clicker means. It will also strengthen your 'Sit' and you can add the hand signal if you don't have one.
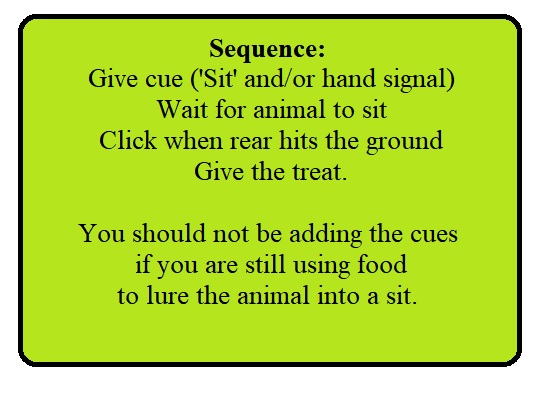
If you have reached this point, you have done everything you need to be prepared to clicker train your pet in your first class. If you are interested in more training techniques, continue reading.
Different ways to get a behavior - There are several ways to teach a behavior with a clicker. You can reinforce a known behavior, lure the dog, shape, or capture.
Reinforcing a known behavior - In this case, you take a behavior the animal already knows, like sit and start using the clicker to mark the correct behavior. Ask the animal to "sit" with a verbal and/or visual cue. As soon as the animal's rear end hits the ground, click and treat. Ask for the behavior, click and treat. Repeat this 5-10 times.
Keep the sessions short, no more than 2-5 minutes at a time. Young animals and cats especially, have a short attention span. Once your pet is used to clicker training, you may be able to go longer, but short and fun is always better.
After a few sessions the animal should start offering the sit on its own. Click and treat this! This is what you want the animal to do, offer behaviors on his own. You will also notice that the animal does not get out of the sit position. That's good too! This will help with your Sit/Stay. Simply wait for a few more seconds before clicking, the animal will learn to "sit" longer. If the animal will not get out of the position, toss the treat to the floor a few feet away from him and then start over.
Luring the animal into position - We've already talked about luring above, but it has a lot of applications. Another way to lure is to teach the Touch command.
- Have a treat ready in your hand with your clicker. Use the opposite hand as your beginning target.
- Hold your target hand out sideways with palm open and fingers flat.
- Place your open palm close to your pet's nose. Most animals will instinctually want to sniff it.
- Once you feel the contact of their nose on your hand (even if it's just a brush of their whiskers), click or say "yes!" and give the treat from the other hand.
- Repeat!
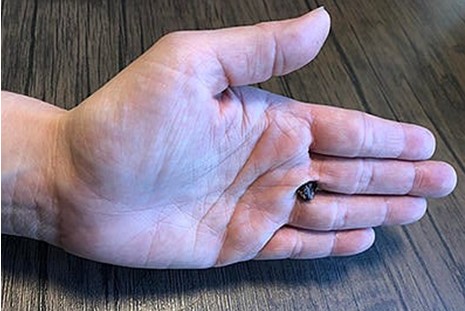 Introducing a Hand Target
If you have trouble getting your pet to come in and touch your hand, use a treat between your fingers (see image above). Present your hand a few inches from the animal's nose so they are encouraged to investigate. As soon as you feel their nose or whiskers, click and treat. Do not give the animal the treat under your thumb; use one from your stash of treats. Repeat the session with a treat lure 2-5 times then pretend to put the treat between your fingers and offer your palm. Just like when we lured the 'sit', we want to fade the food lure as quickly as possible. This is important to keep the animal from becoming dependent on having the food lure to perform the behavior.
Continue to work the 'Touch,' without the treat, just pretending you to put one between your fingers. Present your hand, click and treat. Repeat the session until the animal consistently "Touches" your hand. Then you can add the cue, say "Touch," present your hand, click and treat.
This is a great article with some video examples of Touch.
Remember - You do not want to say the cue word until the animal is offering the behavior consistently. Then you will "name" the command by saying the word just before you "lure" the animal into position. Very shortly the animal will begin to associate the command word with the behavior. The quality needs to go in before the name goes on otherwise you are just nagging the animal with a command he doesn't understand.
Target sticks - You can also use a variation on touch with a target stick. A target stick gives you more flexibility in how you teach the animal to move. They are great for smaller animals so you don't have to bend over as far. They're also great for teaching for things that require a little distance. To teach your pet to touch a target stick is pretty easy. Simply present the end of the target stick to the animal within a few inches of their nose, they will naturally want to sniff, especially if you've already taught Touch. When their nose touches the end of the target stick, click and treat.
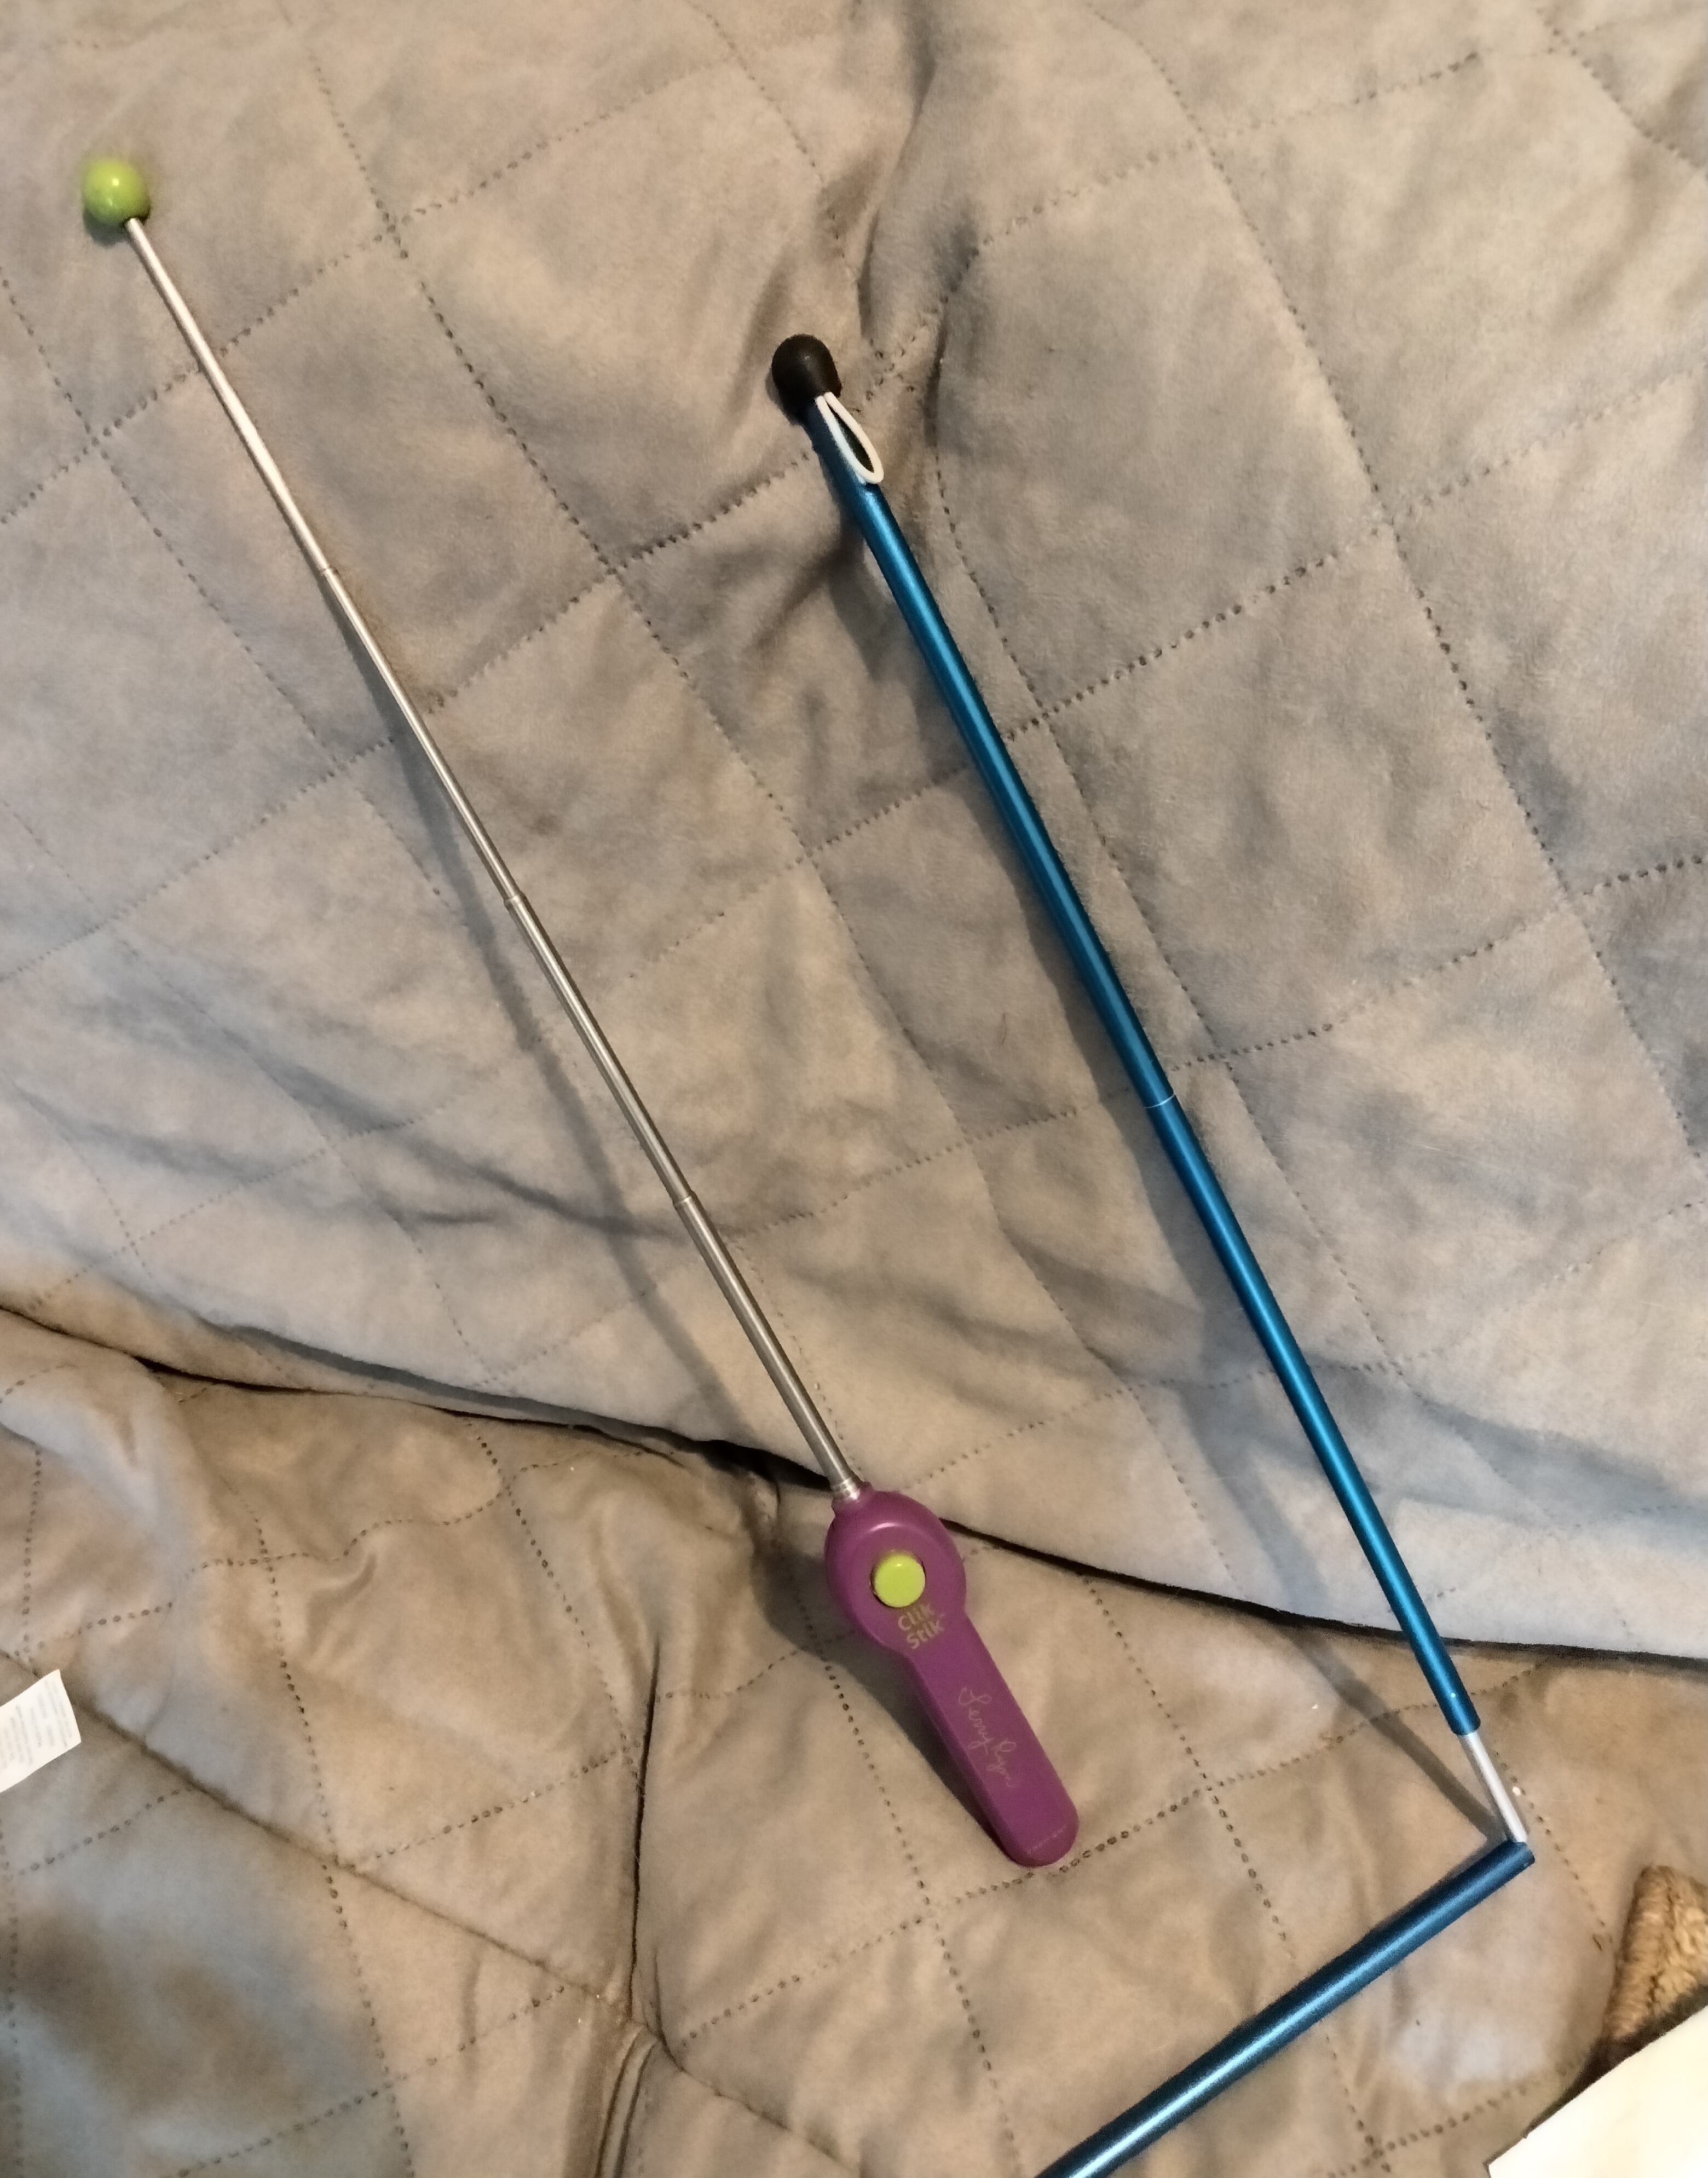
It's important to take the target out of reach once you click. When you and the animal are ready for the next touch, present the target stick again. After several sets of 5-10 treats, you can present the target stick a little further away, maybe 6 inches. If your pet is confused, move the target a little closer. Set them up to be successful. Follow the same rules for naming as discussed above. You can call this Touch as well, or Target. It won't matter if you reuse Touch because your cue is very different. You will now have two Touch cues, one with the palm of your hand and one with the tip of the target stick.
Capturing/shaping a behavior
Capturing a behavior is exactly that. You wait for a behavior that the animal does naturally and then click and treat.
To shape a behavior you must start simple. If you hope to teach the animal to spin, you may have to start with just a slight head turn. Click and treat. Once the animal is offering the head turn, up the stakes and don't click until the animal turns its head a little farther. Step by step, the animal will eventually go all the way around.
You may only get as far as a head turn in the first few sessions. That's okay. Shaping is all about letting the animal figure out the trick. When a behavior is taught in this way it is often much stronger than one that is lured or heaven forbid that the animal is forced into.
Again, do not put a name on the behavior until the animal is offering the complete behavior consistently. Then say the cue just before they offer the behavior, click and treat.
Capturing is my preferred method of teaching down these days.
The clicker is one of the best training tools you will ever use. People who train animals for amusement parks and movies use clickers. All those cats you see on TV are probably trained by clicker.
And don't worry about having to carry it around all the time. A clicker is a great tool, but you can still use your voice to mark behaviors, just be sure to teach a 'marker' word just as you did the click. You also only need to use the clicker when teaching a new behavior or refining a current one. You should not forget to use verbal praise and other forms of reward to reinforce known behaviors or you may lose them.
Any animal can learn to love clicker training, it may take time to undo some of the previous "training", but in the end it is well worth it. A friend had a 9 year old female Chow Chow who pretty much only ate, slept and pottied. She introduced the clicker to the dog and soon had her offering behaviors. The dog even got excited when the clicker was pulled out.
My first dog, Dreamer, was six years old when we first started with the clicker and was initially afraid of the click. Once I worked her through the fear, she was hooked and learned dozens of new tricks. My dog, Shiloh, started clicker training at 10 weeks of age as soon as I brought her home the first time and continued to learn new things her entire life. Her training helped her learn new cues for things as she lost her hearing and sight.
I've been teaching my newest cat, Ruby, with the clicker, and love seeing how much she enjoys learning new tricks.
The best thing about clicker training is the satisfaction of seeing your pet enjoy learning with you. You don't have to force them into a sit or down. The animal learns faster and you get results much more quickly with this positive training technique.
Here's a way to practice clicking and you can see what your time is. Don't worry, a few milliseconds difference won't hurt. Practice always makes you better. The idea is to know what you are looking for, watch for it and click when it happens.
Practice your timing below, or try this link: Click timing game.
Test your Response time!
Click the "Start" button first, and wait until the background color changes. As soon as it changes, hit "stop"!Free DHTML scripts provided by
Dynamic Drive




Shouldn't Your Pet Have Pawfect Manners?
You can have a well-behaved pet, let me show you how.
Schedule Your Class!(281) 440-6818
judy.pawfectmanners@gmail.com